Advanced Navigation Setup
Perfect for larger scale projects like neighbourhood or city explorers. The navigation is inspired by Google Earth navigation's familiar feel and is much more of a "free roam" or explore type.
Part of the UE5 Navigation Template for intuitive advanced controls for architectural visualization.
When to Use Advanced Navigation
- Neighborhood explorations
- City-scale projects
- Large context models
- Multi-building developments
- Any project requiring free-roaming camera control
Installation
- Open your Unreal Engine project
- Navigate to Window > World Settings
- Set your Game Mode to
TSI_Gamemode_Advanced
This will automatically configure:
- Appropriate player character
- Player controller
- HUD class for advanced navigation
Complete Setup Steps
Advanced Navigation follows the same setup process as Basic Navigation:
- Set Game Mode to
TSI_Gamemode_Advanced - Configure Collision Channels (SelectableMesh and FloorPlate)
- Assign Floor Collision to walkable surfaces
- Assign Selectable Collision to interactive objects
- Add Player Start actor
- Configure Selection Material (MI_SelectionHighlight)
See: Basic Navigation Setup for detailed instructions on Steps 2-6. The process is identical for Advanced Navigation.
How It Works
The advanced navigation system uses a unique anchor-based approach:
- The pawn and camera are always in the same location
- The player moves relative to an anchor point (
BP_NavAnchor) - The anchor dynamically updates its position under the cursor
- This creates a Google Earth-style exploration experience
Anchor System
The BP_NavAnchor blueprint provides:
- Dynamic position updates
- Cursor-relative movement
- Smooth exploration controls
- Large-scale environment support
Key Differences from Basic
| Feature | Basic Navigation | Advanced Navigation |
|---|---|---|
| Best For | Single objects/buildings | Neighborhoods/cities |
| Camera System | Spring arm | Fixed camera with anchor |
| Movement Style | Center-focused orbit | Free roam exploration |
| Orbit Behavior | Always orbits screen center | Orbits any point under cursor |
| Zoom Direction | Always toward center | Toward cursor position |
| Panning | Standard pan | Cursor stays locked to object |
| Scale | Small to medium | Large environments |
Advanced Navigation Controls
Third Person Mode (Default)
- Left Mouse Button - Orbit around point under cursor (not center!)
- Right Mouse Button - Pan camera (object stays under cursor)
- Mouse Wheel - Zoom toward cursor position
- Click Object - Focus and lock orbit to object
- Hover Object - Highlight object
First Person Mode
- F Key - Toggle first person mode
- Left Mouse Button - Look around
- Right Mouse Button - Strafe (WASD-style movement)
- Click Floor - Move to location
- Mouse Wheel - Change FOV (zoom)
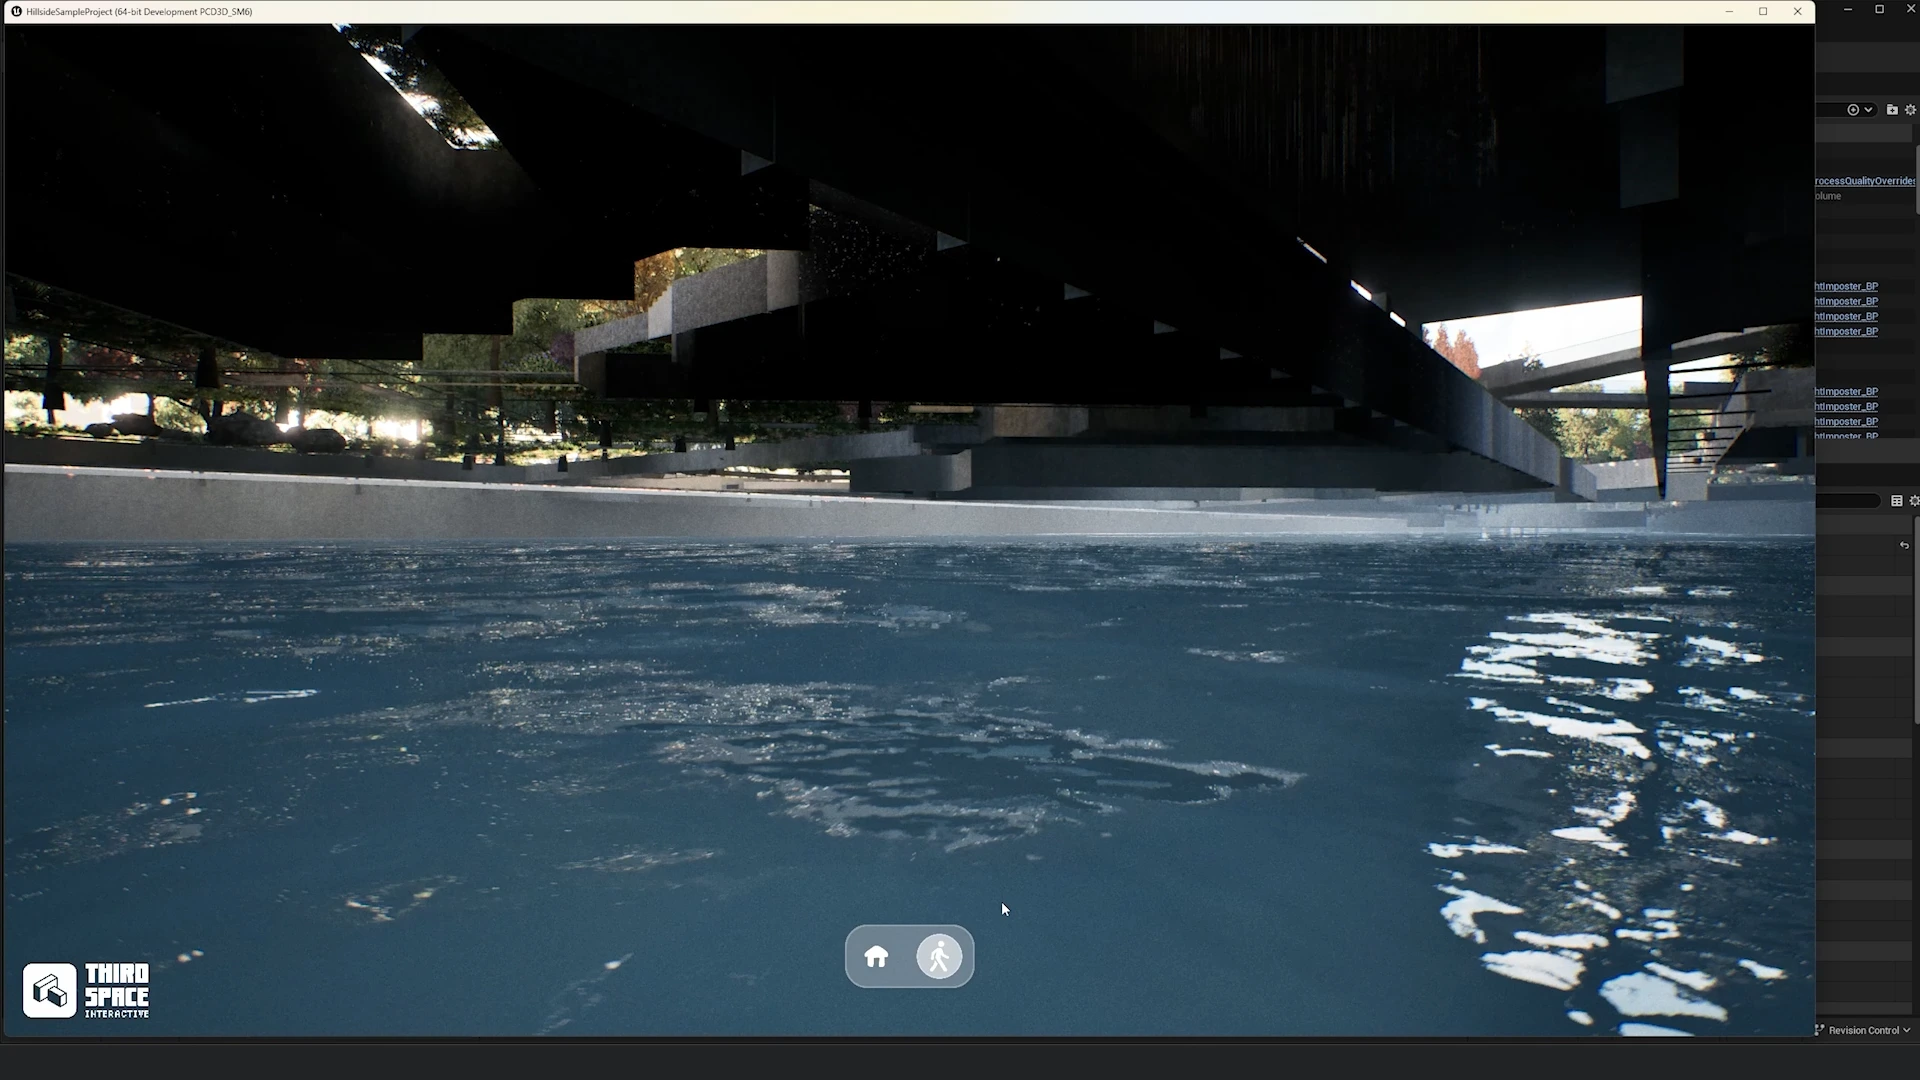
Key Advantage: Unlike Basic Navigation, Advanced Navigation allows you to click anywhere on screen to orbit around that point, zoom toward any direction, and pan with objects staying under your cursor.
Edge Case: Collision Complexity for Level Instances
The Problem
When using Level Instances or Instanced Static Meshes, players may fall through the floor in first person mode. This is a common issue that occurs because collision complexity is not enabled by default on many instance meshes.
Identifying the Issue
- Switch to first person mode (F key)
- If the player falls through the floor → collision issue
- Open the Level Instance containing your floor geometry
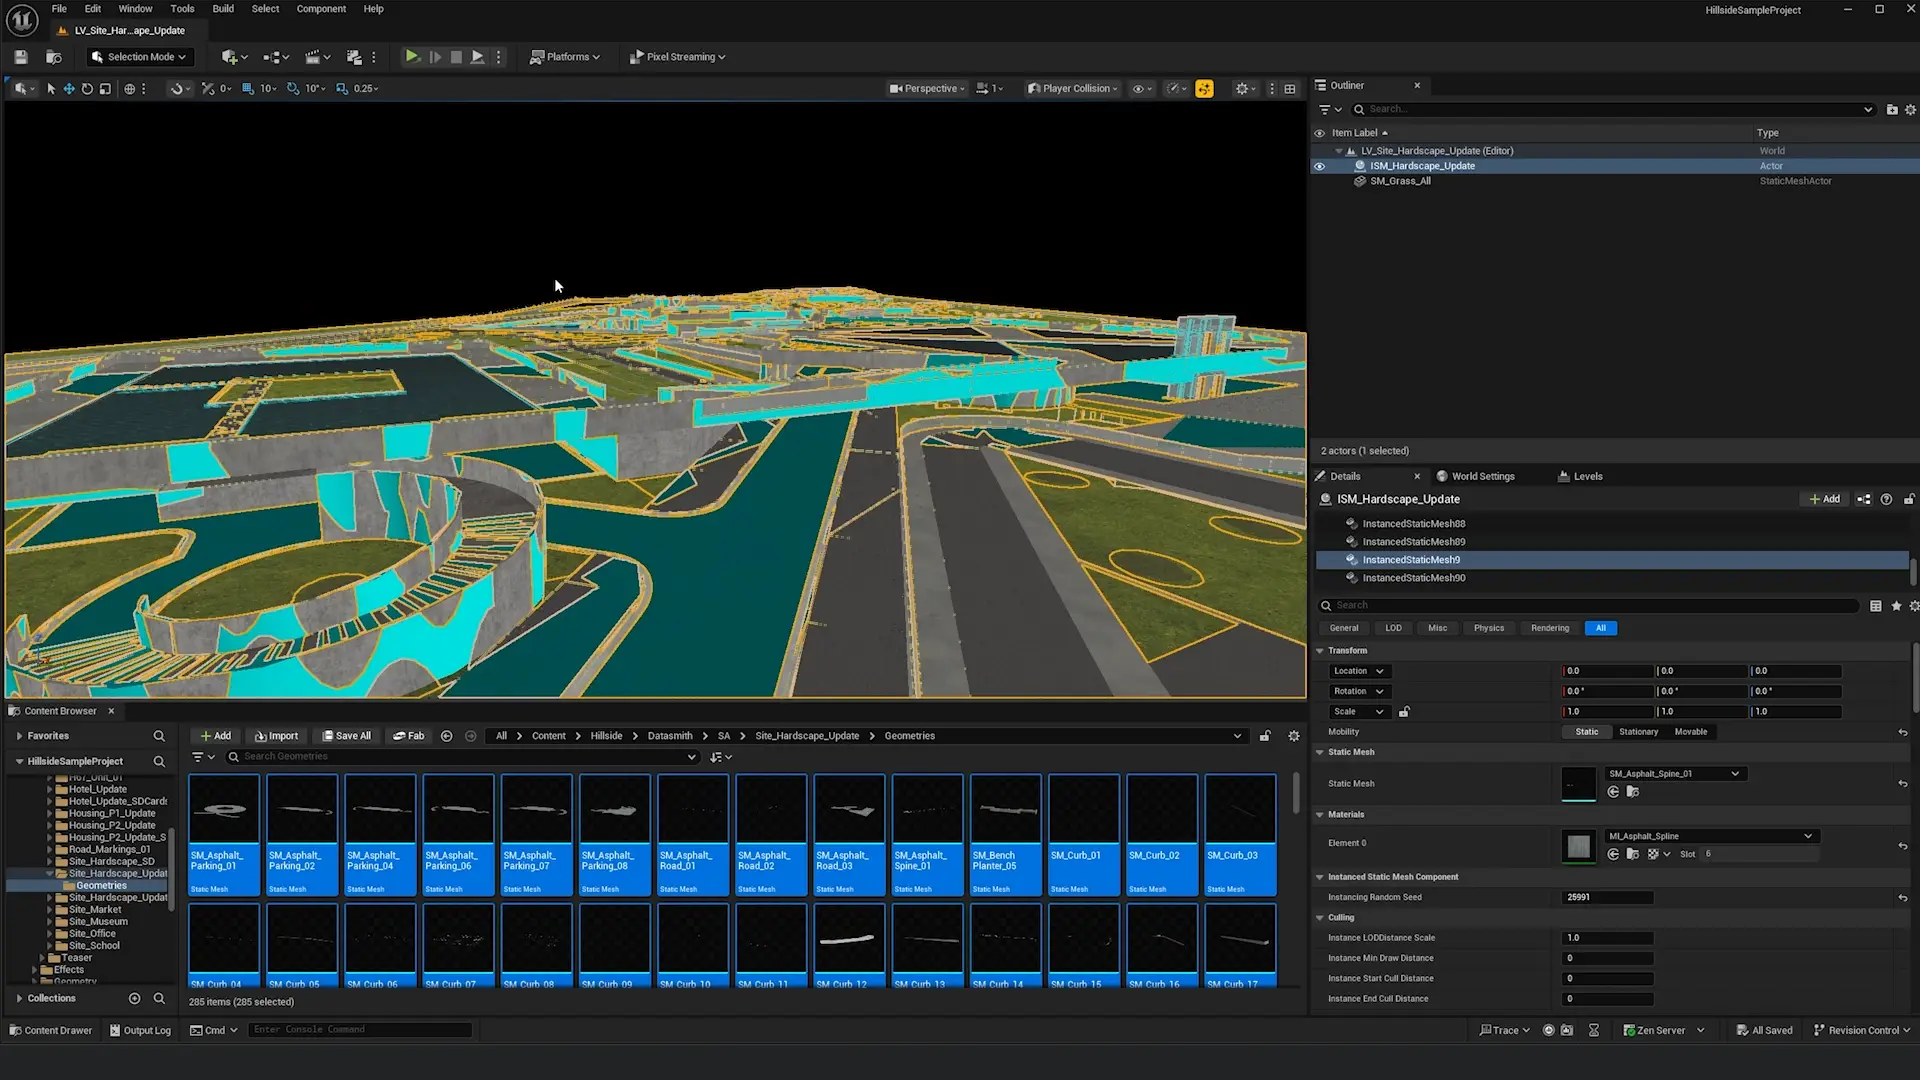
- In the viewport, enable Show > Collision > Player Collision
- Blue objects = collidable with player
- Non-blue objects = NOT collidable with player
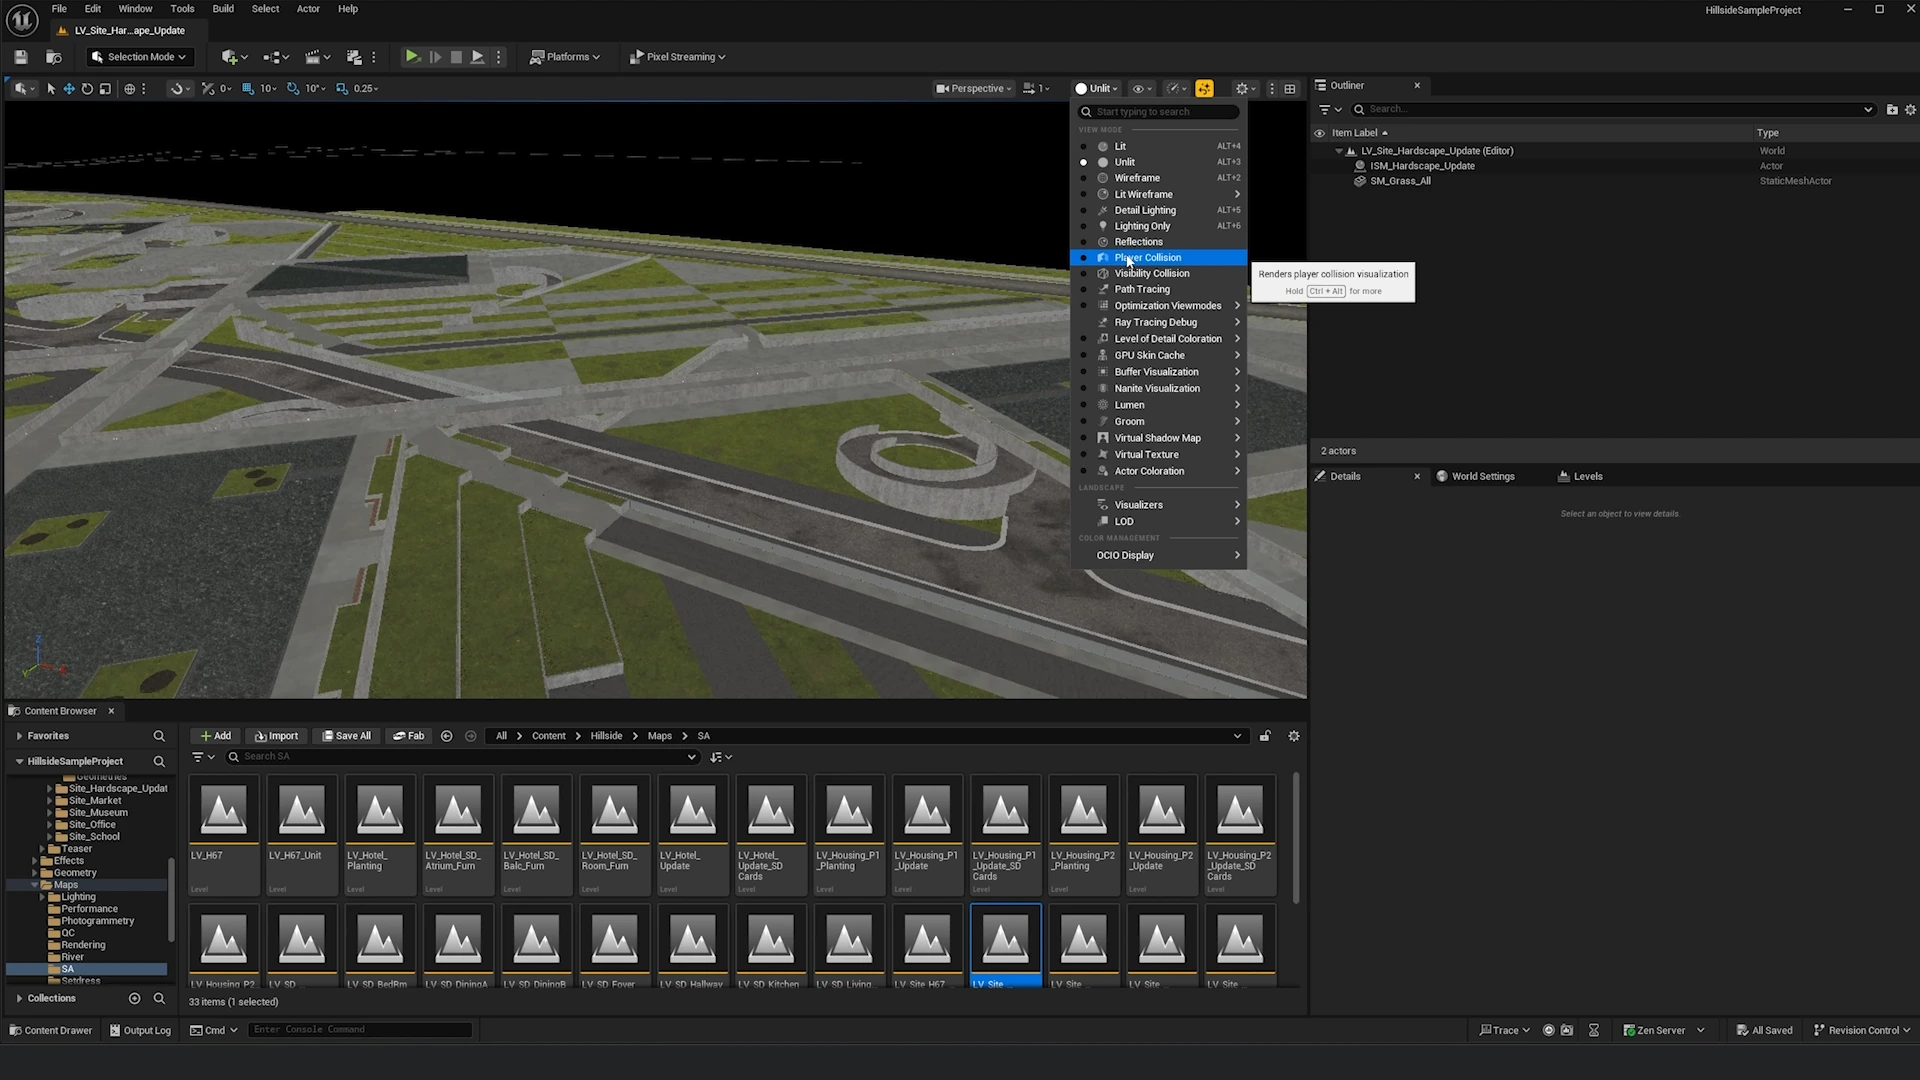
Why This Happens: By default, many static meshes have their Collision Complexity set to "Project Default," which often doesn't enable collision for instanced meshes.
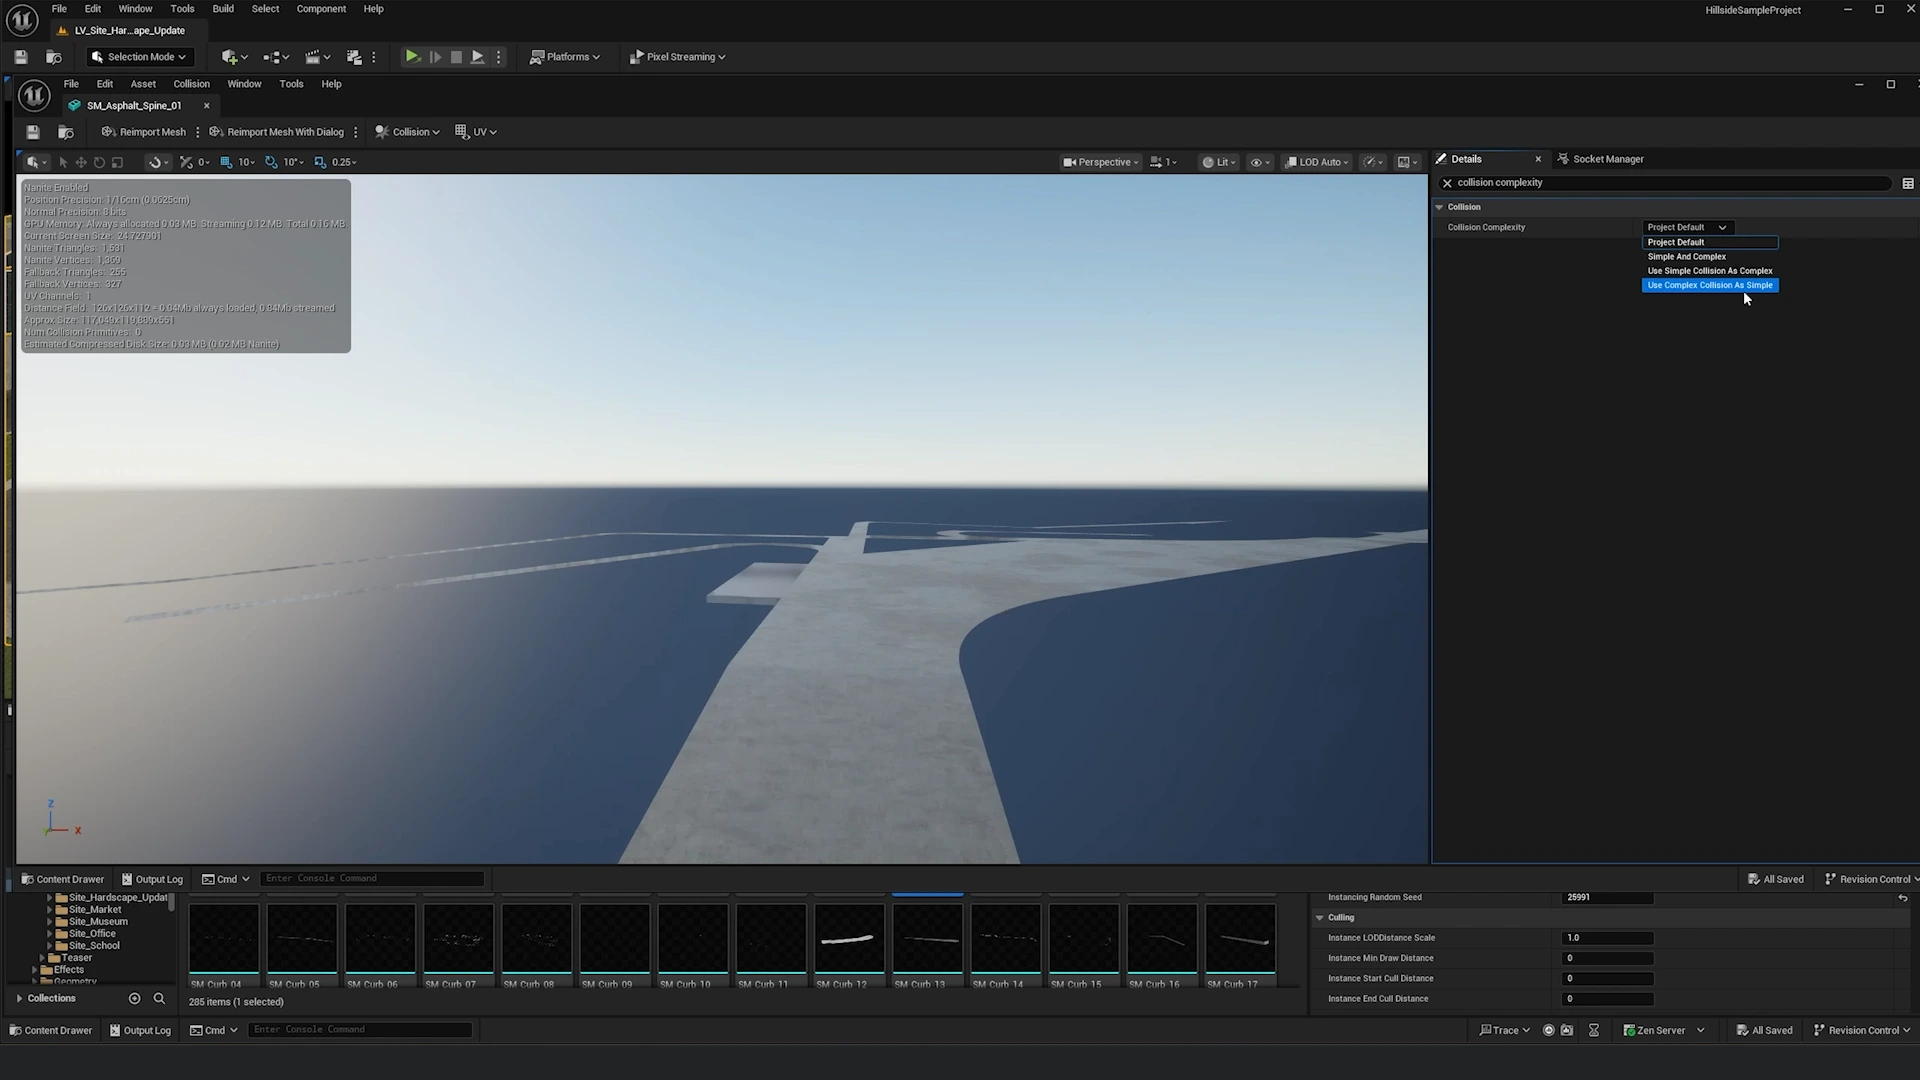
Solution 1: Fix Single Mesh
For a single problematic mesh:
- Select the mesh in your level
- In Details panel, browse to the Static Mesh asset (magnifying glass icon)
- Double-click to open the Static Mesh Editor
- Search for "collision complexity"
- Change Collision Complexity from Project Default to Use Complex Collision As Simple
- Save the asset
Solution 2: Batch Fix Multiple Meshes (Recommended)
For many meshes - this is the workflow you'll want to use:
- In the Content Browser, navigate to the folder containing your floor/ground meshes
- Press Ctrl + A to select all meshes in the folder
- Right-click → Asset Actions > Edit Selection in Property Matrix
- In the Property Matrix, click Pin Columns
- Type "collision complexity" and press Enter
- The column will be pinned to the right side
- Select all rows in the property matrix (Ctrl + A)
- In the Collision Complexity dropdown at the bottom, select Use Complex Collision As Simple
- Press Ctrl + S to save all changes
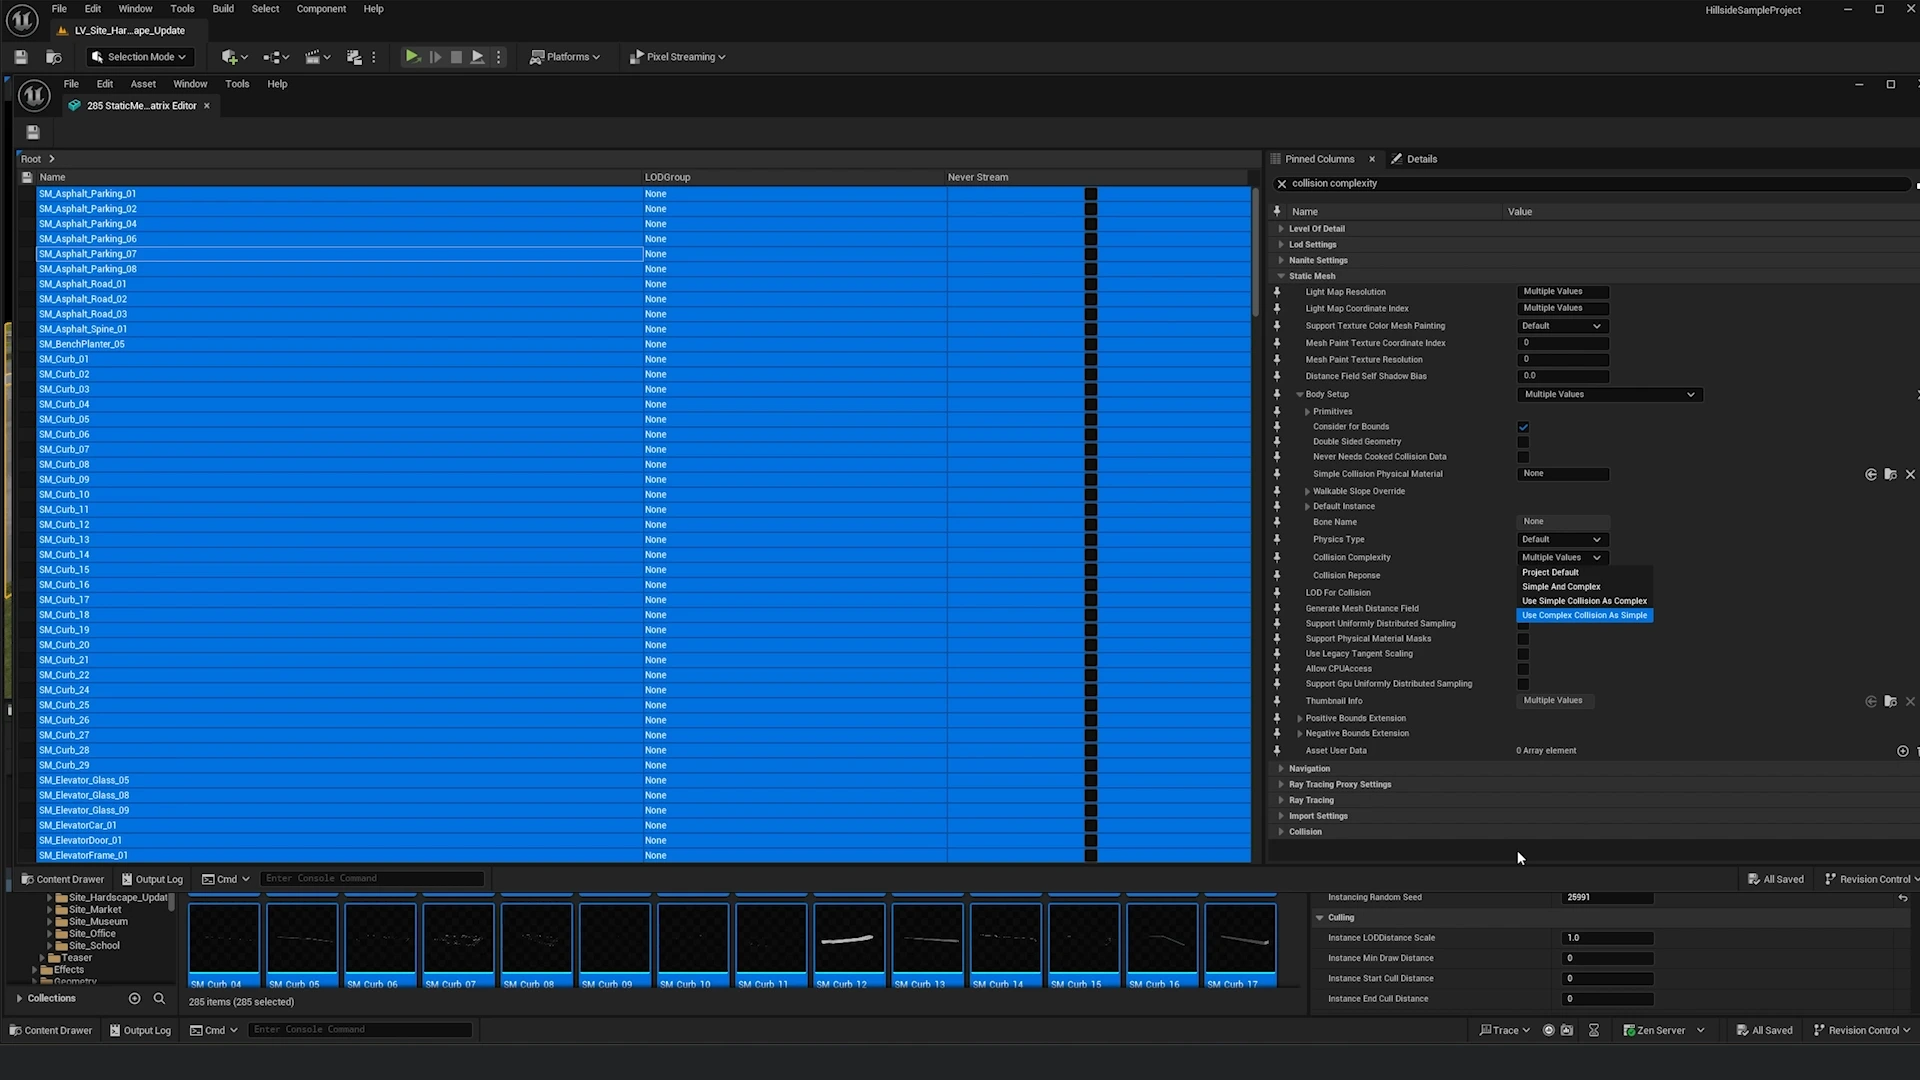
Pro Tip: This Property Matrix workflow can batch-edit hundreds of assets in seconds. In the video example, 285 assets were fixed at once!
Verification
After applying the fix:
- Return to your main level
- Enable Show > Collision > Player Collision in the viewport
- Verify floor surfaces now appear blue (collidable)
- Press Play and test in first person mode
- Player should no longer fall through the floor
Performance Note
Using "Use Complex Collision As Simple" increases physics calculation cost slightly. For very large scenes (1000+ objects), consider:
- Using simplified collision meshes instead
- Only applying complex collision to critical walkable surfaces
- Using collision LODs for distant objects
Testing Advanced Navigation
Press Play and verify all features work:
✅ Click anywhere on screen to orbit around that point ✅ Zoom toward cursor position (not limited to center) ✅ Pan with object staying under cursor ✅ Switch to first person without falling through floor ✅ Click to move on floor surfaces ✅ Explore beyond immediate building into context ✅ Camera transitions smoothly between modes
Free Exploration
Unlike Basic Navigation, Advanced Navigation allows you to:
- Explore beyond the immediate building
- Navigate through large context models
- Fly over entire neighborhoods
- Switch seamlessly between macro and micro views
Use Case Example: In a city explorer, users can zoom out to see the entire development, then zoom into a specific building, and finally enter first person to walk through interior spaces—all with smooth, intuitive controls.
Troubleshooting
Most Common Issue: Players falling through the floor in first person mode. See the Collision Complexity section above for the solution.
For other issues, see the Troubleshooting Guide:
- Falling Through Floor (Detailed)
- Can't Click to Move
- Objects Not Selectable
- Camera Issues
- Performance Problems
Note: If Advanced Navigation feels different than Basic, this is expected! Advanced Navigation allows orbiting around ANY cursor position (not just center), zooming toward cursor direction, and cursor-locked panning. For simpler center-focused navigation, use Basic Navigation instead.
Next Steps
- Selection System Configuration →
- Troubleshooting → (Detailed collision fixes and common issues)
- Basic Navigation → (For simpler, center-focused navigation)