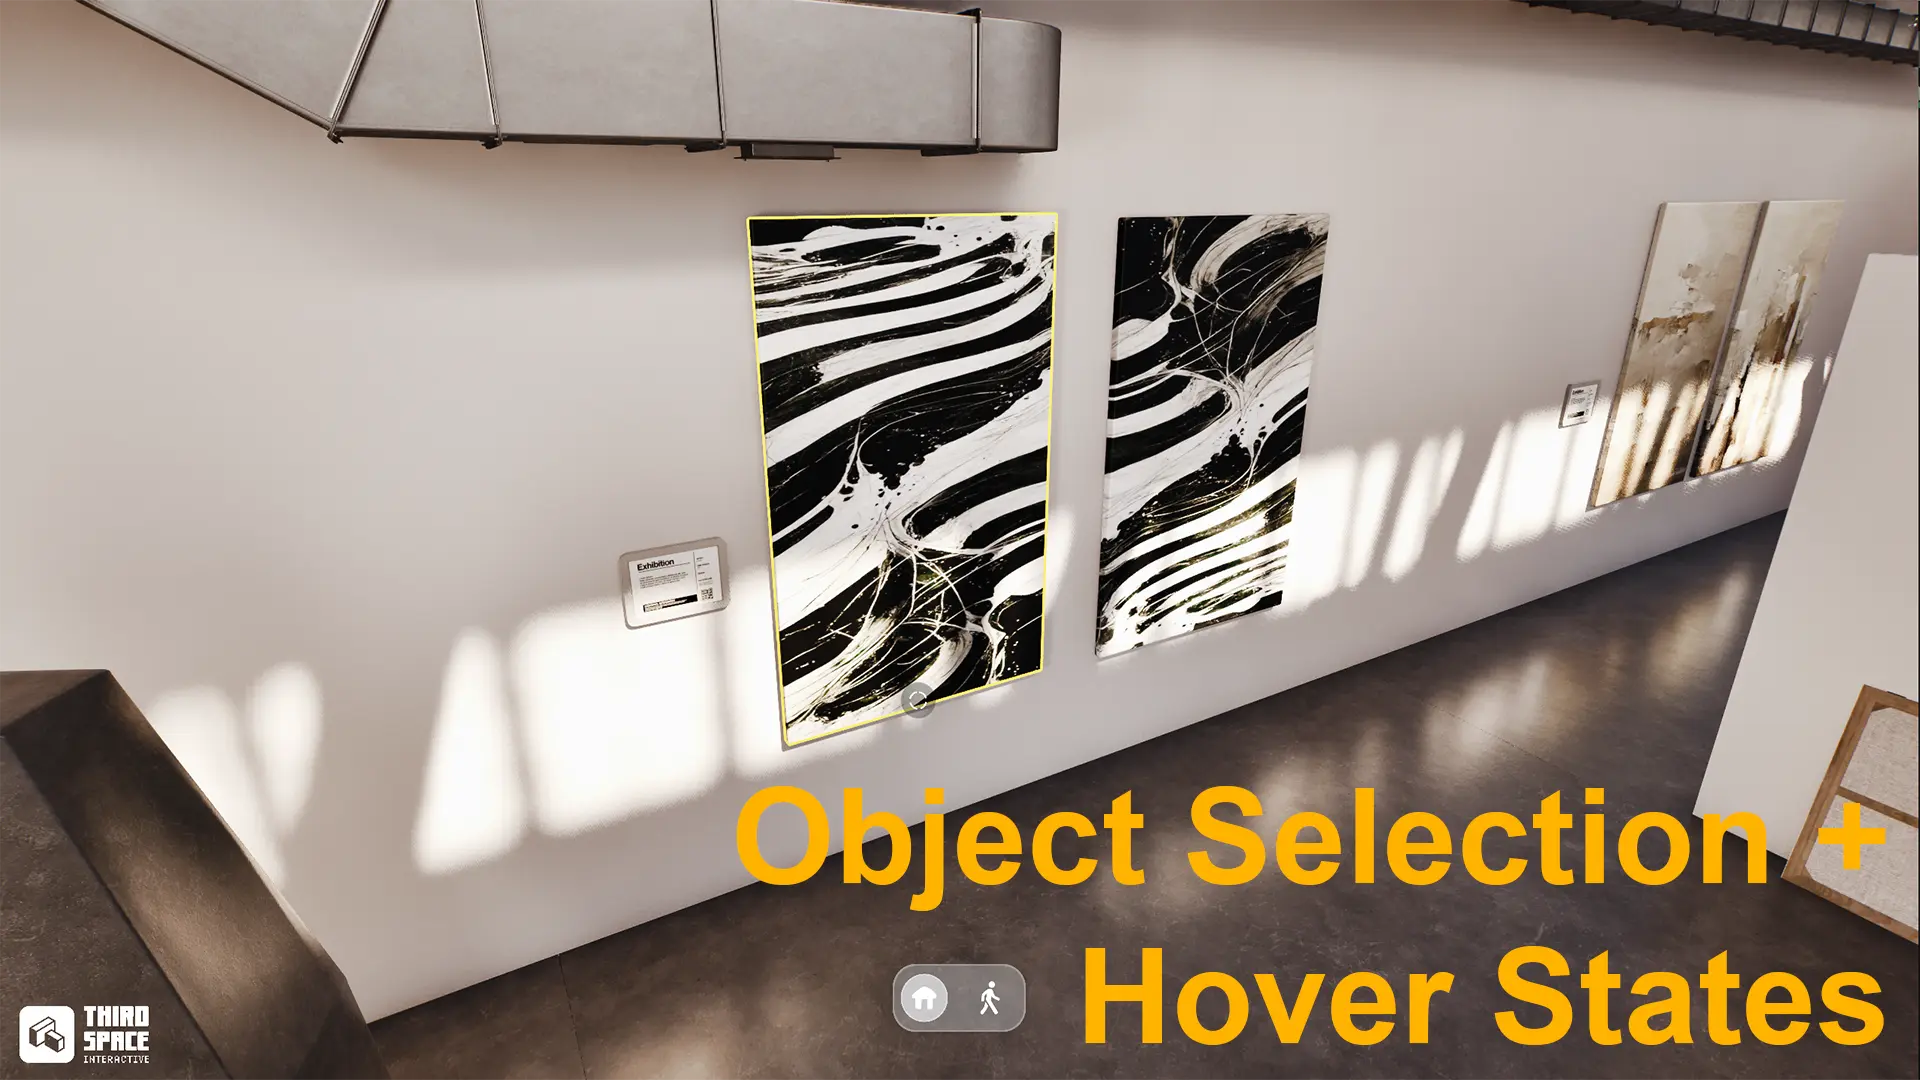
Selection System
The selection system provides visual feedback when hovering over and selecting objects in your scene. It uses a post-process material to highlight objects with custom outline effects.
Part of the UE5 Navigation Template featuring Google Earth-style controls for architectural visualization.
Features
- Hover to Highlight: Objects highlight when the cursor hovers over them
- Click to Select: Click on objects to select them
- Camera Focus: Selected objects automatically focus the camera
- Orbit Lock: Camera orbits lock around the selected object
- Customizable Highlight: Fully customizable highlight color, width, and glow
How It Works
The selection system uses two main components:
- BP_SelectionManager - Blueprint that handles hover/selection logic
- MI_SelectionHighlight - Post-process material that renders the highlight effect
When you hover or select an object:
- BP_SelectionManager performs a ray trace to detect the object
- The object is rendered to a custom stencil buffer
- MI_SelectionHighlight post-process material reads the stencil
- The highlight appears as a colored outline around the object
Setup Requirements
Step 1: Collision Channel Configuration
IMPORTANT: Both selection and hover rely on the "SelectableMesh" object collision channel.
To make any mesh selectable:
- Select the mesh in your level
- In the Details panel, find Collision settings
- Set Collision Presets to
Custom - Set Object Type to SelectableMesh
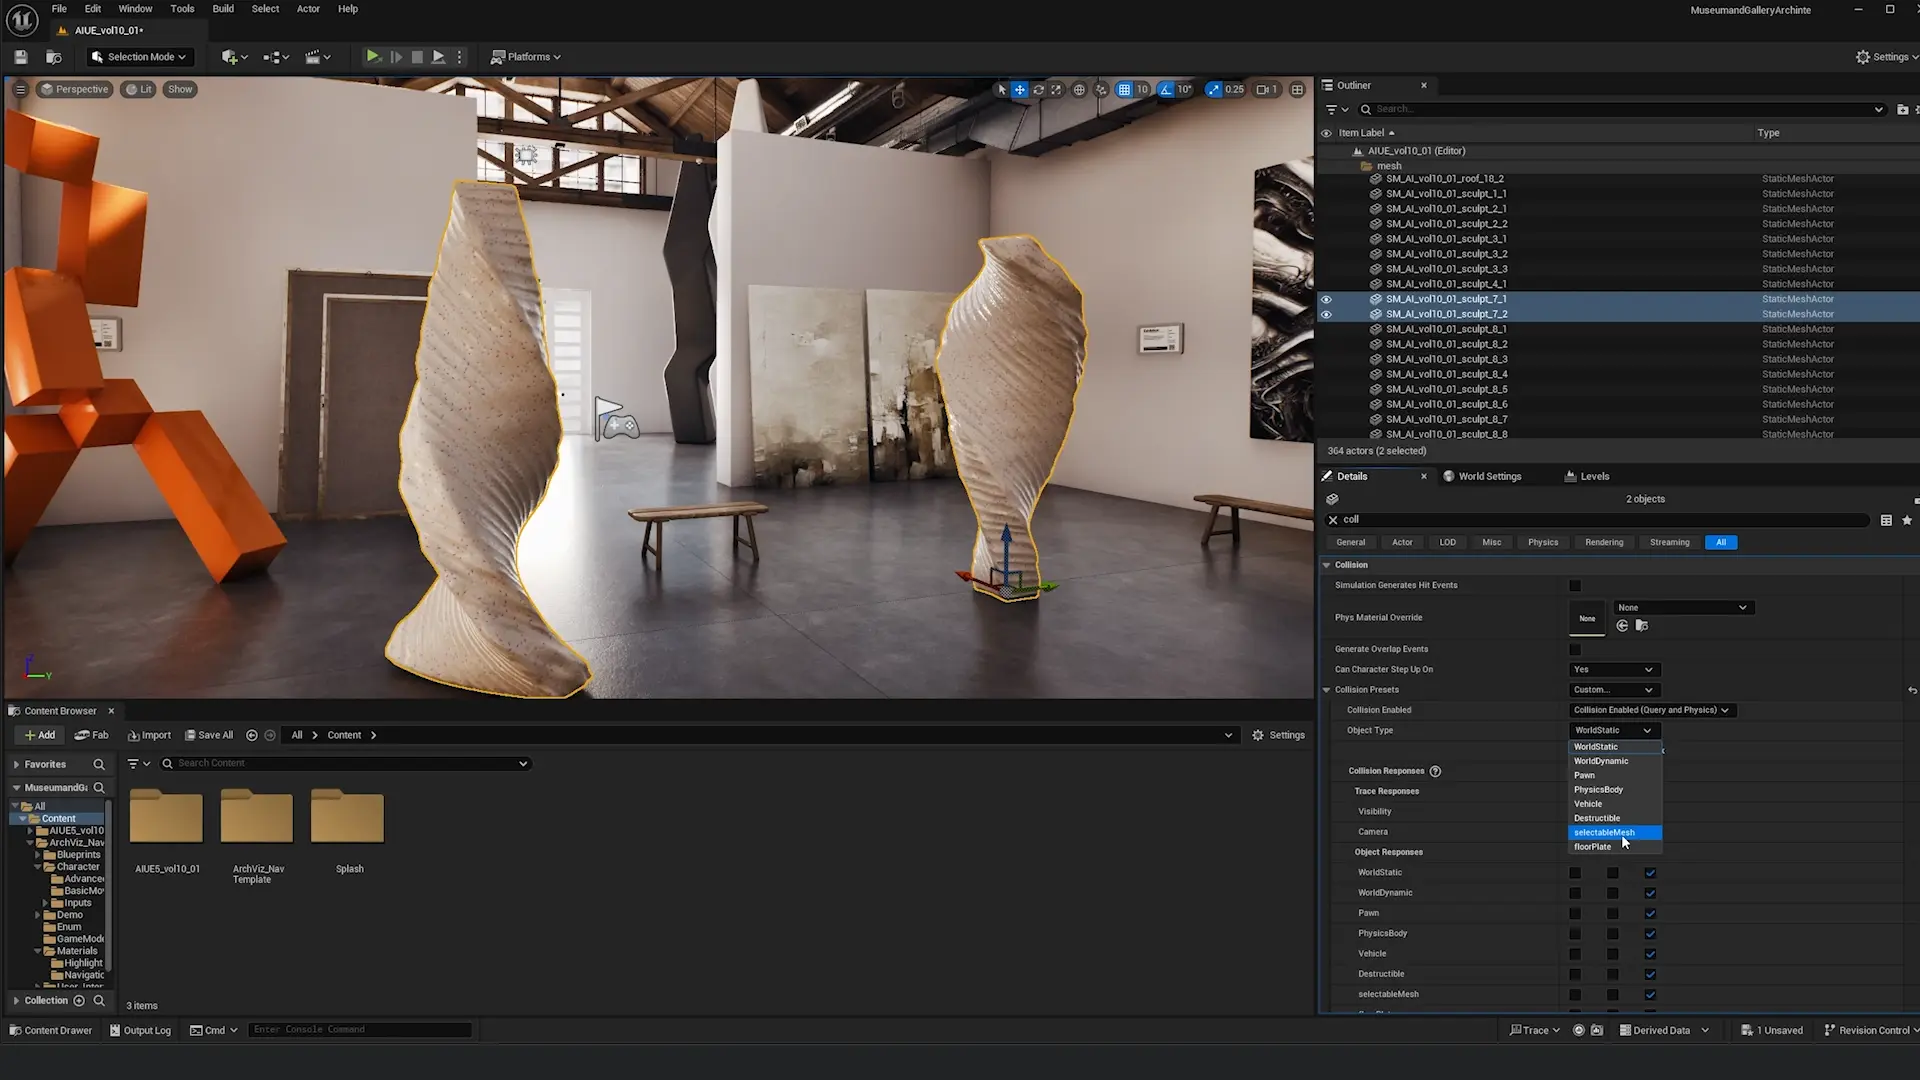
See: Basic Navigation Setup for detailed instructions on creating the SelectableMesh collision channel.
Step 2: Add Post-Process Material
The highlight effect requires a post-process material to be added to your level.
Add Post-Process Volume (if needed)
- Check if your level already has a Post Process Volume in the Outliner
- If not, add one:
- Click + in the Place Actors panel
- Search for "Post Process Volume"
- Drag into your level
- Select the Post Process Volume
- In Details, check Infinite Extent (Unbound)
Add Selection Highlight Material
- Select your Post Process Volume in the Outliner
- In the Details panel, search for "material"
- Find Rendering Features > Post Process Materials
- Click the + dropdown to add a new array element
- Set to Asset Reference (not Blendable)
- Click the asset selector dropdown
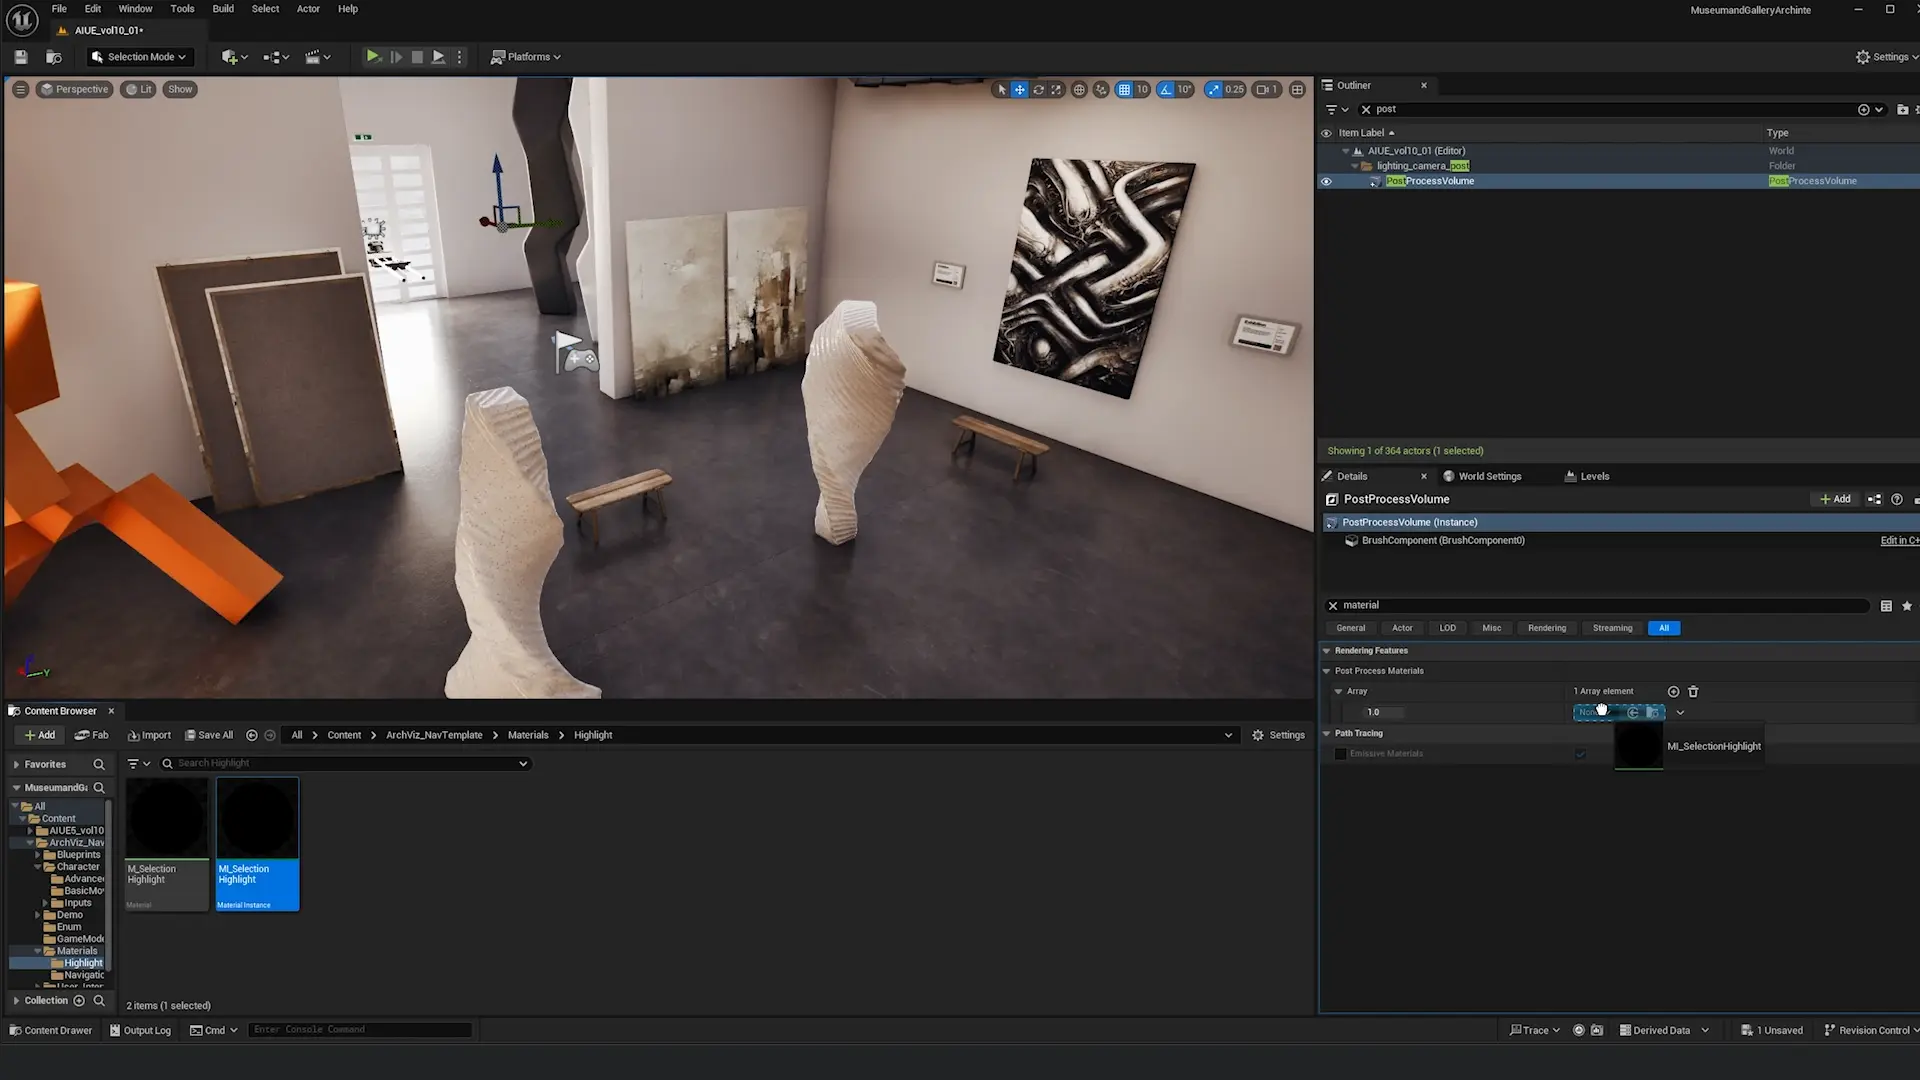
Select MI_SelectionHighlight
- Navigate to:
ArchvizNavigation/Materials/Highlight/ - Select MI_SelectionHighlight
- Close the asset picker
The selection highlight is now active!
Customizing the Highlight
Opening the Material Instance
- In Content Browser, navigate to:
ArchvizNavigation/Materials/Highlight/ - Double-click MI_SelectionHighlight
- The Material Instance Editor opens
Available Parameters
Highlight Color
Type: Linear Color (RGB)
Default: Orange (1.0, 0.5, 0.0)
Usage: Main color of the selection outline
Example Colors:
- Blue:
(0.0, 0.5, 1.0) - Green:
(0.0, 1.0, 0.5) - Red:
(1.0, 0.0, 0.0) - White:
(1.0, 1.0, 1.0)
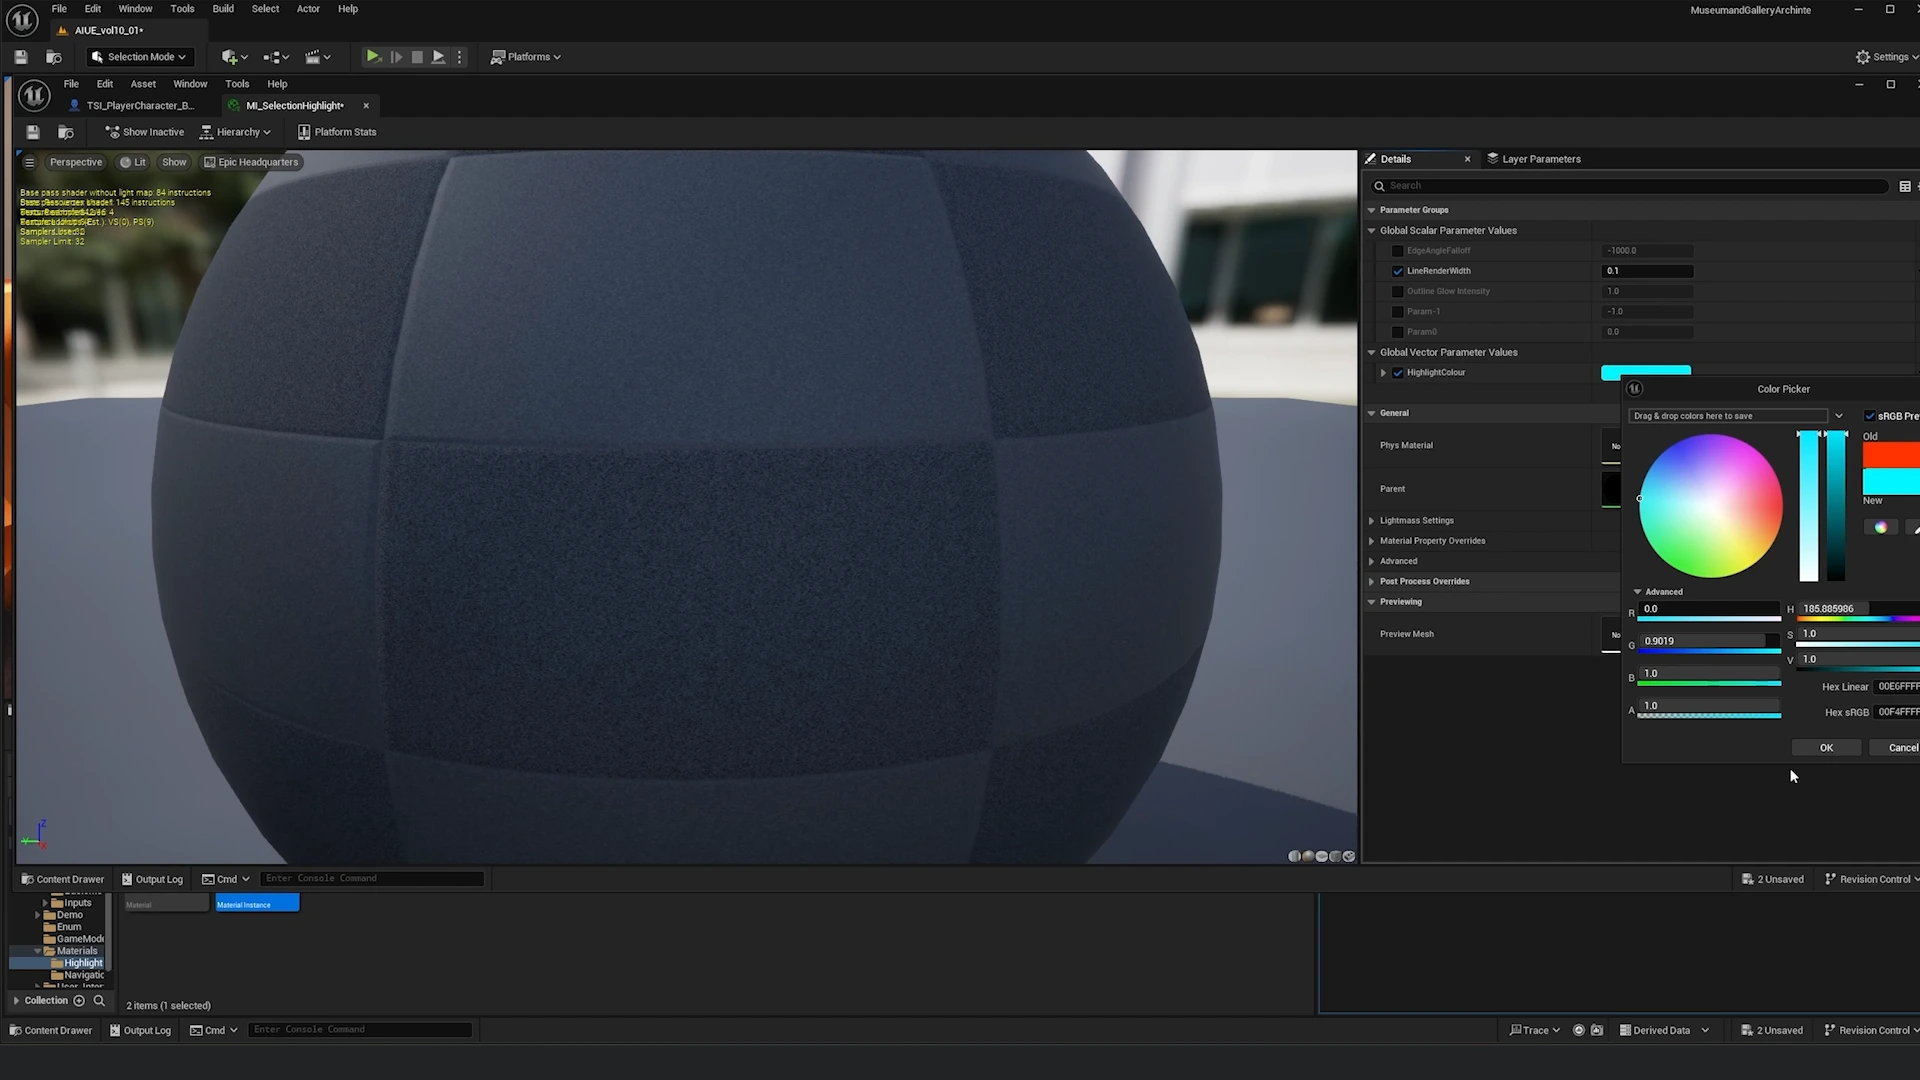
Line Width
Type: Scalar Range: 0.5 - 5.0 Default: 2.0 Usage: Thickness of the outline
- Thin outline: 0.5 - 1.0
- Medium outline: 1.5 - 2.5
- Thick outline: 3.0 - 5.0
Falloff
Type: Scalar Range: 0.0 - 2.0 Default: 1.0 Usage: Softness of the outline edge
- Sharp edge: 0.0 - 0.3
- Medium softness: 0.5 - 1.0
- Soft glow: 1.5 - 2.0
Glow Intensity
Type: Scalar Range: 0.5 - 3.0 Default: 1.5 Usage: Brightness multiplier
- Subtle: 0.5 - 1.0
- Normal: 1.0 - 2.0
- Bright: 2.0 - 3.0
Recommended Presets
Preset 1: Subtle Blue (Professional)
Highlight Color: (0.0, 0.5, 1.0)
Line Width: 1.5
Falloff: 0.8
Glow Intensity: 1.0
Preset 2: Bold Orange (Attention)
Highlight Color: (1.0, 0.5, 0.0)
Line Width: 3.0
Falloff: 1.5
Glow Intensity: 2.0
Preset 3: Clean White (Minimal)
Highlight Color: (1.0, 1.0, 1.0)
Line Width: 1.0
Falloff: 0.3
Glow Intensity: 0.8
BP_SelectionManager
The selection manager blueprint handles the core selection logic:
- Ray tracing for cursor detection
- Object highlighting on hover
- Selection state management
- Camera focus transitions
- Orbit lock behavior
Using the Selection System
- BP_SelectionManager is automatically included in the TSI game modes
- Configure selectable meshes with the SelectableMesh collision channel
- Add MI_SelectionHighlight to your Post Process Volume
- The system will automatically handle hover and selection
Customization
The selection manager can be customized in the blueprint to adjust:
- Highlight behavior
- Selection rules
- Camera focus speed
- Orbit lock parameters
- Transition animations
Testing the Selection System
In-Editor Testing
- Press Play (Alt + P)
- Move mouse over objects with SelectableMesh collision
- Verify highlight appears
- Click to select and verify camera focuses
- Test first person mode selection
Troubleshooting
Having issues with the selection system? See the Troubleshooting Guide for detailed solutions:
Use Cases
Architectural Walkthroughs
Goal: Subtle, professional highlights
Recommended Settings:
Color: Light Blue (0.2, 0.6, 1.0)
Line Width: 1.5
Falloff: 0.5
Glow Intensity: 1.0
Product Configurators
Goal: Bold, eye-catching highlights
Recommended Settings:
Color: Bright Orange (1.0, 0.6, 0.0)
Line Width: 3.0
Falloff: 1.5
Glow Intensity: 2.5
Museum Experiences
Goal: Elegant, minimal highlights
Recommended Settings:
Color: White (1.0, 1.0, 1.0)
Line Width: 1.0
Falloff: 0.3
Glow Intensity: 0.8
Performance Considerations
The selection highlight material has minimal performance impact:
- Single post-process pass
- Stencil buffer read (very fast)
- Screen-space effect (resolution-dependent)
Optimization Tips
- Use simple falloff - Lower falloff values = faster rendering
- Limit concurrent selections - Only highlight one object at a time
- Disable when not needed - Turn off post-process when UI is open
- Mobile considerations - Reduce glow intensity on mobile devices
Next Steps
- Basic Navigation → (Complete setup guide)
- Advanced Navigation → (For larger scale projects)
- Troubleshooting → (Common issues and solutions)